Connecting services
Services are a set of basic services provided to customers within the framework of the software functionality of the system. Each service acts as a separately charged entity with a charge for the amount of use. The system also implements the functionality of periodical services with a fixed write-off of funds for the period of use.
In order to switch to Services, you need to use the menu of your personal account, the “Customer” section.
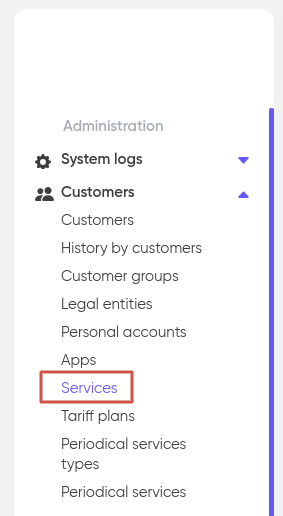
The “Services” section contains a list of all services currently connected to customers with the ability to switch to any service and add or change its settings.
Set filters to specify the query on the page, and click “Apply”.

Type of service
The following types of services are implemented in the system:
| Type of service | Description |
|---|---|
| SIP telephony | Telephone services over the internet using the SIP protocol. Allows you to make calls both within the network and to external numbers, with support for high-quality voice communication and additional functions such as conference calls and conversation recording |
| API | The service allows you to integrate applications and system through API-requests. It includes service activation, data provision and interaction with various system to create comprehensive solutions |
| TTS | A service that converts text into natural-sounding speech. It allows you to automate the voicing of text information for users over the phone, which can be used in self-service system, IVR menus and voice notifications |
| ASR | A technology that allows you to convert spoken speech into text in real time. It is used to create voice interfaces, automate call processing, transcription of conversations and interaction with voice assistants |
| PUSH ID | A solution for secure authentication and user registration in online and offline environments. Uses push notifications to confirm user actions, providing additional protection and convenience |
| INCOMING | Processing incoming calls with flexible routing, recording of conversations and integration with CRM systems |
| REDIRECTION | The function of redirecting incoming calls to pre-specified phone numbers or external system, which allows you to ensure the availability of employees or services at any time and anywhere |
Connecting a new service
In order to connect the service to the customer, go to his profile and open the “Personal accounts”. Then go to the personal account to which the new service will be linked or create a new one.

Next, in the Services section, click on “+ Add”.

Select a new service from the “Service type” drop-down list. After that, select a zero-cost tariff plan that corresponds to the type of service you selected. For example, for the type of IP telephony service, specify the tariff plan, in our example: “Zero cost (Call)”. Next, select the routing group. Then specify the “Distribution priority”. High priority services will be served first.

After completing all the settings, click “Save”. From this moment on, the new service has been created and linked to the personal account.
Setting up a remote connection
The “Connections” section is used to configure access to services from external systems using various protocols. To add a new connection, go to the service and click on “+ Add”.
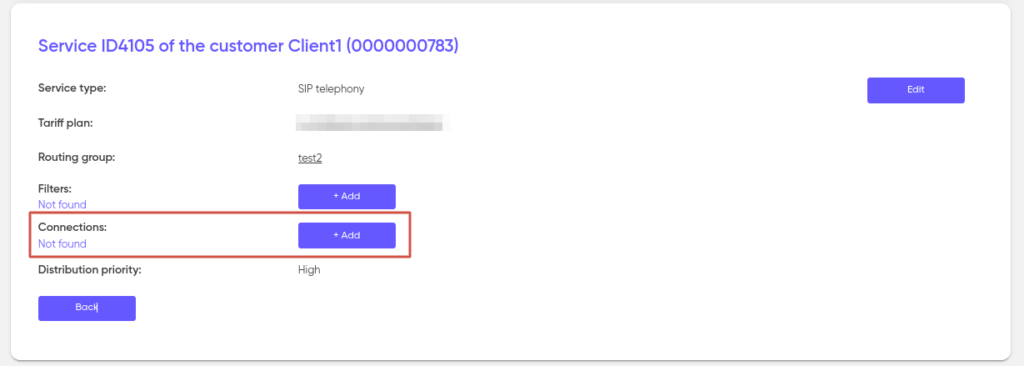
Table of supported protocols for different types of services:
| Service type | Supported transmission protocol |
|---|---|
| SIP telephony | SIP |
| API | SMPP, HTTP, Out HTTP (in development), IMAP, Telegram (in development) |
| PUSH ID | SMPP, HTTP |
SMPP
Setting up SMPP transmission involves filling in two parameters: SMPP login and SMPP password. To create an SMPP login, use the Latin alphabet. Next, come up with a password in the same way or use the auto-generation function. After creation, the username and password are transmitted to the client.
To support older systems, it is possible to configure identification on the SMS center — the Identificator on SMSC. If it is not required, set the value to “0” (zero).
The SMPP protocol also implies the possibility of limiting the reception speed on links — Reception speed restriction. The default value is 50.
After completing the above procedures, click “Save”.

HTTP
Follow the steps below to configure data transmission via the HTTP protocol:
- Select the type of authorization:
- API Key – a generated key is used;
- Bearer Token – also uses a generated key;
- Basic Auth – uses a login and password.
- Depending on the selected authorization type, provide the client with the appropriate access credentials:
- for API Key and Bearer Token – the generated key;
- for Basic Auth – the login and password.
- Then, set the Callback version (V1, V2, or V4). See the Callback section for details.
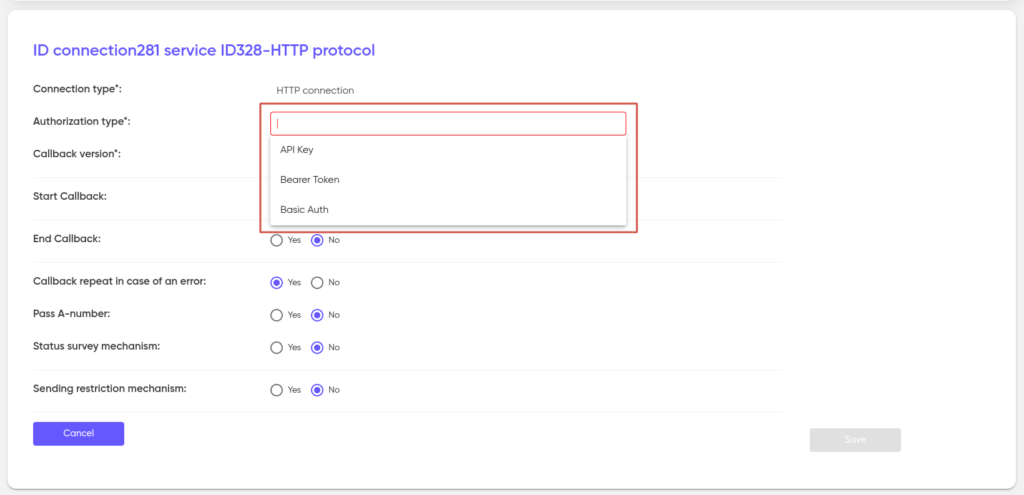
The Callback protocol implies the possibility of transmitting statuses. To transmit the start and end processing statuses, activate StartCallback and EndCallback. Specify the Transfer Method and address (URL). If the external system requires authorization, specify the Username and Password. Activating the CallbackRepeat setting in case of errors involves resending the callback status if an error occurred during the transmission of the status.
If you need to transfer an A-number, activate the appropriate setting — Pass A-number.
When activating the “Status Survey Mechanism” setting, the external system will be polled, and the statuses coming from it will be recorded in the database of our system.
The sending restriction mechanism performs the function of anti-fraud. When this setting is activated, the number of shipments per number will be limited to the number that will be indicated in the Number of sendings field.
Save the settings you have made.
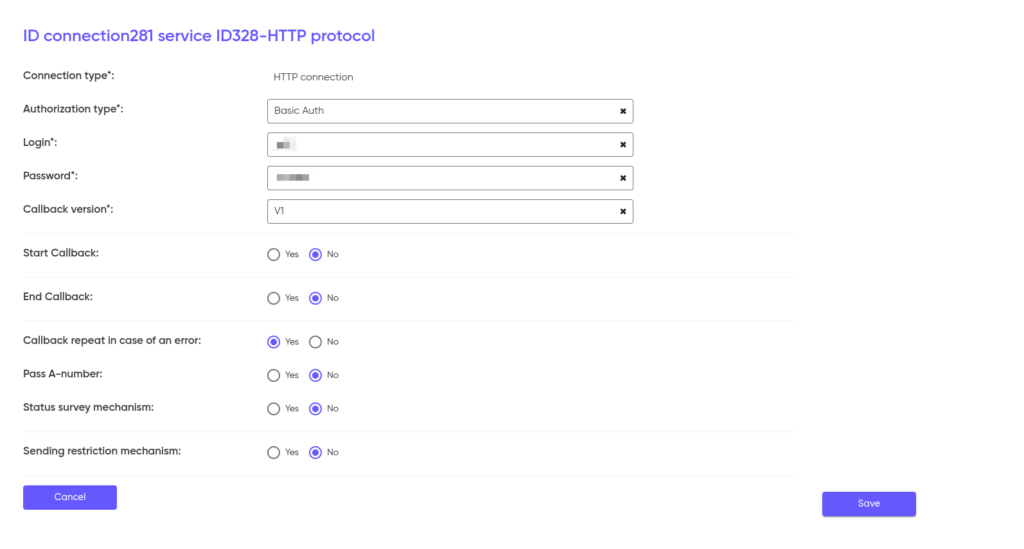
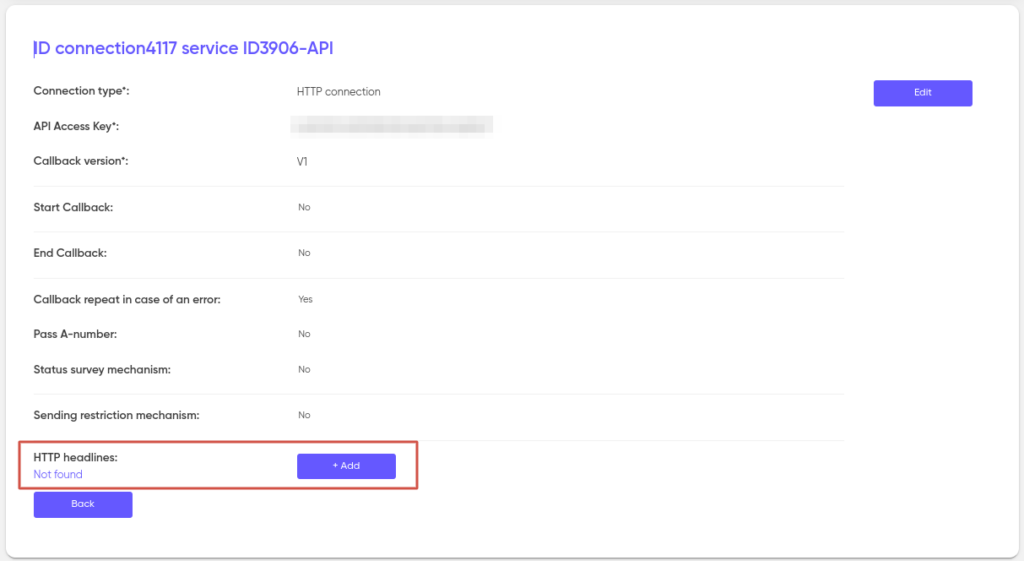
Please note that when transmitting an HTTP request in the callback exchange mechanism, we can add HTTP headers. To add an HTTP header, click add and specify an arbitrary name and value.

IMAP
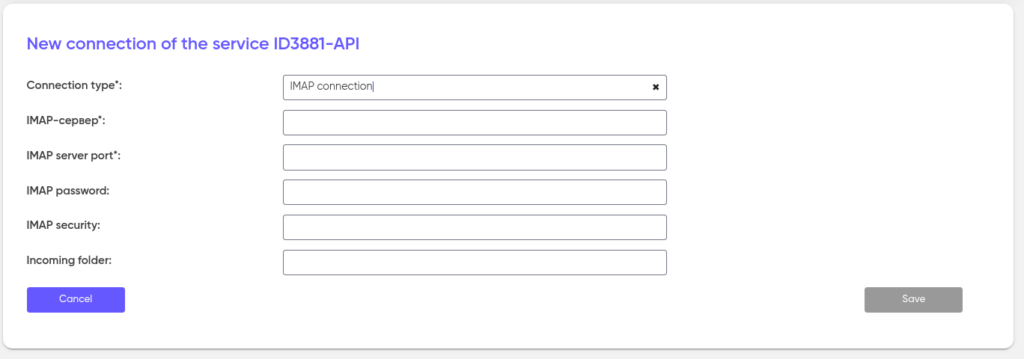
E-mail access protocol. The way to activate the application using this protocol is a letter. To set up IMAP access, specify the IMAP-server, IMAP-port, and IMAPPassword. Next, select the IMAP protection method: No, SSL or STARTTLS and specify the Incomingfolder where the emails will be located (for example: INBOX).
SIP
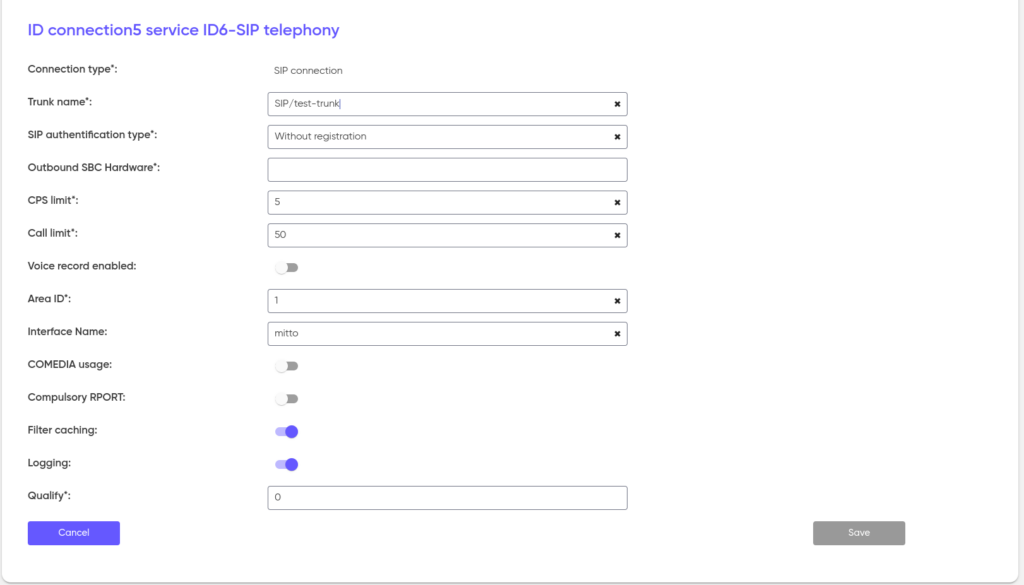
To set up a SIP connection, specify the Trunk Name.
Depending on whether authentication is required on the trunk, select the appropriate type from the SIP Authentication Type drop-down list. When selecting the Require registration with credentials type, enter the Sip Auth User – username and Sip Auth Password – password. If you select the Do Not require registration type, select Outbound SRC Hardware, the type of equipment that will serve the request direction.
Write down the CPS limit – the limit on the number of simultaneous calls per line, and the Call limit – the limit on the number of connecting lines.
Setting up Voice record enabled – activates the function of recording conversations from the trunk.
The Area ID field is always set to 1, and the Interface Name field is set to mitto.
Using COMEDIA – ignores the data in the RTP headers and sends voice traffic to the source IP. It is used when the client’s hardware does not support NAT, but is located behind NAT. Activating the setting instructs the system to send a request not to the address specified in the packages, but to the one from which they come.
Forcibly RPORT – adds the rport parameter to the header of SIP messages, which forces the remote server to send responses to the IP and port of the traffic source, and not what is specified in the Via messages.
Filter caching – forces the platform to cache information about filters, rather than requesting it every time a call is made.
Logging – enabling the logging mechanism.
Qualify – the frequency of questioning the SIP device by the SBC for operation and availability for making a call. The value is indicated by a number (milliseconds). An OPTIONS message is sent. If the value 0 (zero) is specified in the line, the polling function is disabled.
